Friday, February 8, 2013

Fenugreek-Pisco Fennel Garnish

This will turn out to be a non-trivial amount of work for a protein garnish, but it is fun to do. This recipe is modified from a baby-fennel recipe I used to do in New York, and the result is mostly the same. This is the time of year we're getting our fennel bulbs from our farm delivery, so finding cool stuff to do with them is the work.

A few notes before I start: the essence of this blog is how to make fine cuisine with the what you have on hand, and fenugreek and Pisco aren't run-of-the-mill items. Fenugreek is sold most commonly in American stores as a tiny yellow pebble-looking seed in the spice area, but it can be found in special Turkish or other Mediterranean specialty grocers as dried or fresh leaves. It is a main component of that wonderful Turkish Doner-kabob or shish-kabob smell or flavor. It's recognizable and awesome. It's also not totally necessary for this dish. Pisco is a Chilean and Peruvian brandy at about 70 proof, and can be substituted for with wine or a higher octane spirit.

Starting off you want to clean up the fennel and slice it for work. Here we see mine has been used already for something else (salad maybe):


Next we get some of the supplies needed. Pepper mill, kosher salt, and chili-flakes (optional) all are rather regular kitchen staples. The dark liquid is stock, which I usually have on hand from making our cat's food regularly (from boiling chicken carcasses), and the light liquid in the plastic measuring cup is the Pisco. Again, wine or another spirit would work, but the alcohol element is necessary. I'm not showing the fenugreek because you don't truly need it, and mine is so old I'm not sure of its potency anymore. I'm not showing the spice tumeric, which you will need. Tumeric is a yellow powder that stains everything it touches neon yellow or green or orange, and is something a spice cabinet should stock. You'll never know when you'll need it, and a little goes a long way, so it's not so bad to have.


Make sure you slice out the hard core bits from the bulb, and get rid of any brown spots. Also shown are a few minced garlic bulbs.


In your pan start with some hot oil, then add the fennel, and salt and pepper.


As the fennel softens, add the garlic and chili flakes and fenugreek (if you've got it), but make sure they don't burn. As they toast, add a sprinkle of tumeric:


As the aromas start to blend and the fennel still retains some crunch (it's a tough bulb, and will caramelize a bit before it ultimately softens), deglaze with the Pisco/alcohol element:


Let it reduce until there's no liquid (using perhaps less than what I've shown in my earlier photo), and then add the stock. Again, use less than in my photo. Bring to a simmer and let it go for a bit:


In the New York recipe the amounts of liquid are both quite small, so in the end, the tiny bit of liquid residue and the soft and tasty fennel can be mounted with butter and turned into something so savory and delicious that you don't know what happened. I didn't mount it with butter, but that's mainly because I added too much stock. That's not the worst thing, though.

As a garnish, use a slotted spoon and place the fennel on top of a red-meat protein, beef or lamb work best. Yummy:


Monday, January 28, 2013

Chicken Wings: Tasty Scraps

One of the good things about buying whole chickens is all the things you can do. I'm able to parse out the breasts, leg quarters, carcass for the cat food and stock for rice, and all the while squirreling away the wings into the freezer for a rainy day.

Or until the bag gets too full.

When that happens--overflowing stock--you know there's enough to yield an entire dinner for two and lunch for one the following day.

That, and wings are good. They're the tastiest scraps you'll be finding on a chicken. If you want to deep fry them so be it. If you want to pan fry them and butter baste them to make 'em sexy, so be it again (highly recommended).

For me, with the (overwhelming) amount of wings I had stored, I went ahead and roasted them in the oven. I tossed them in a large bowl with olive oil, salt and pepper, and a little cayenne and placed them out on sheet trays:


There were a lot, seriously:


Wings are just too good, and I mean that with all sincerity. Not that it matters, but the forearms are my favorite.

Wednesday, January 23, 2013

How to Cut "Nice" Cucumber for Salads

This method for cucumber cutting can be used for both American style green salads as well as Mediterranean style chunky salads (the tomato, olive, cucumber and feta kind). Some folks will tell you that it's always best and "nice" to peel the cucumber. That's right and wrong. It's best to be able to see both green skin and white flesh on each piece of cucumber.

Like so:

Start with a piece of cucumber:


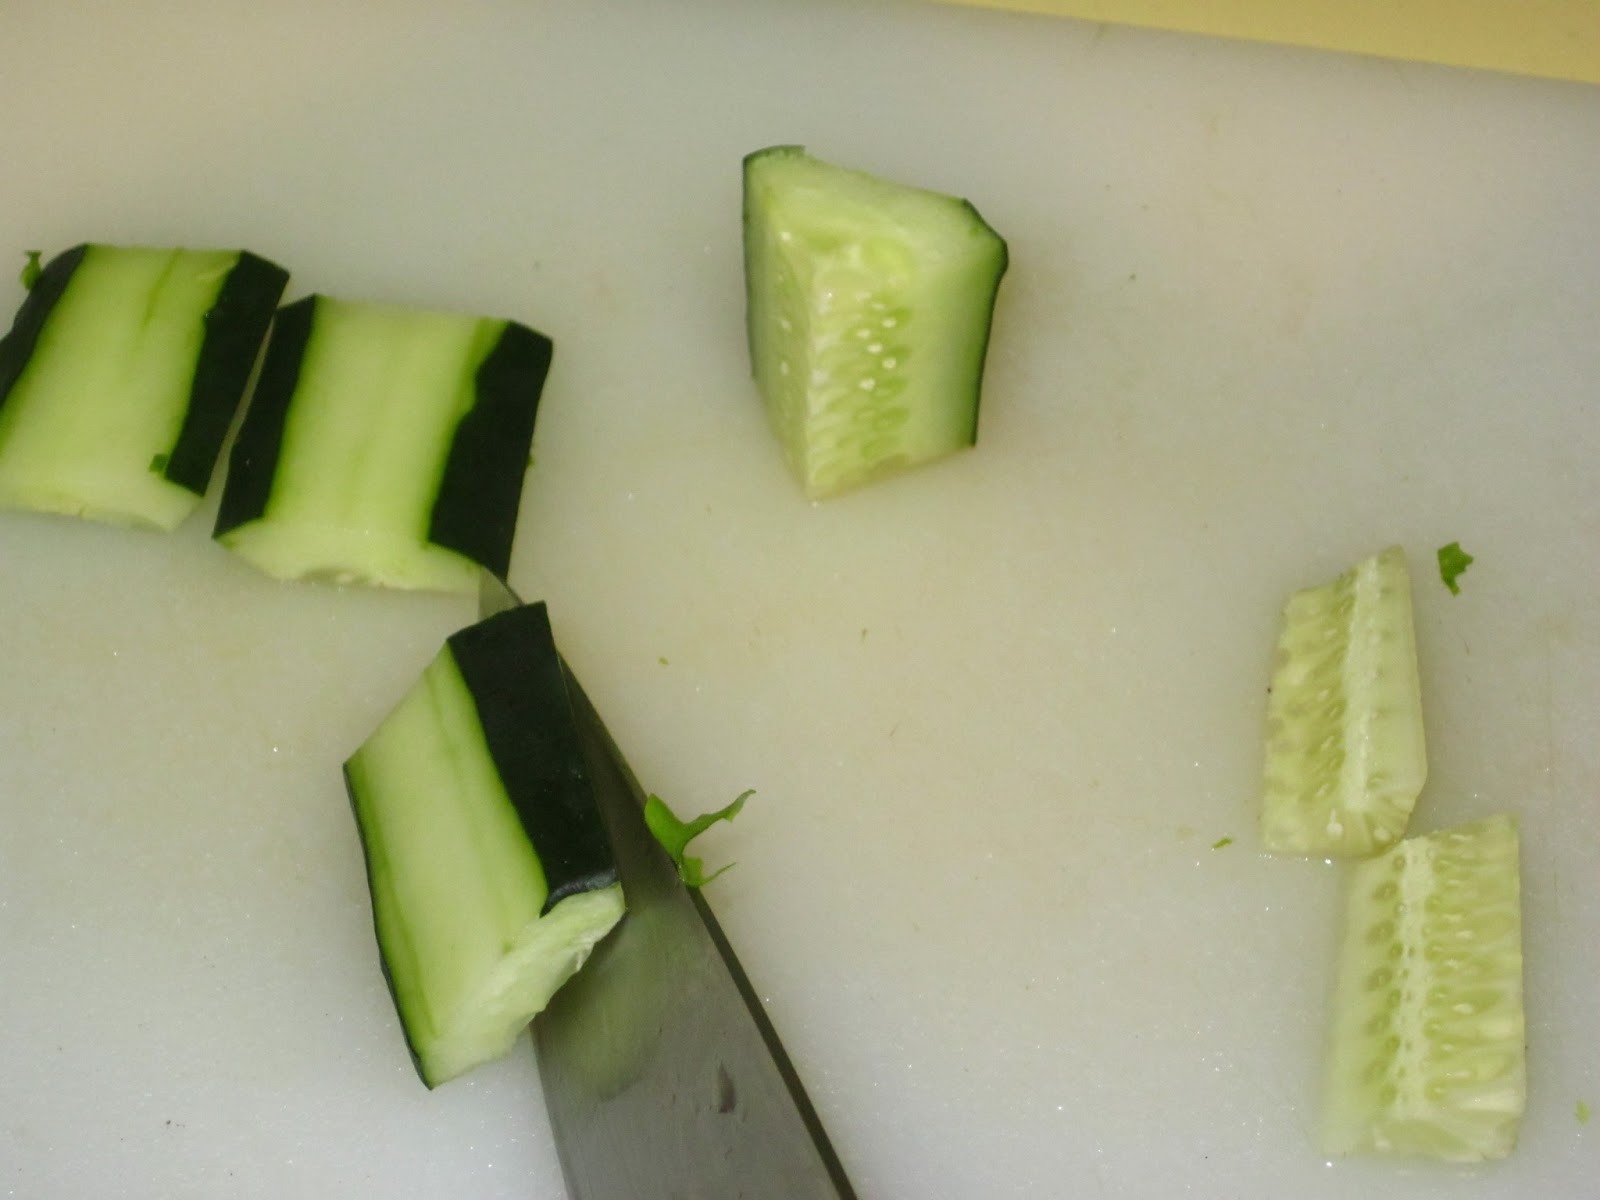
From there, using a knife slice off pieces of skin at places you call top, bottom, and sides, like this:


Now quarter the cucumber thus:


Next, tip each quarter on its side and slice out the seeds. Those are definitely not "nice":


Next, slice each quarter piece in half down the white section...


...and then dice into appropriate sizes. This yields uniformly sized pieces of cucumber with a bit of green and a bit of white on each piece, with nary a seed in sight (is the idea anyway):


The remaining seed centers are great to scarf down with a pinch of salt and pepper. Yummy and refreshing.


Monday, January 21, 2013

Simple Beef Tips and Rice

Beef Tips is a dish I first heard of while working for a caterer in Texas. Apparently many people are familiar with it, but I probably wouldn't eat too much of what we made. I wasn't sure what it supposed to be at the time, and nobody said it was just braised beef cubes served over rice. Now that's pretty good stuff. Braised beef over rice is simple and grubbin and a good way to stretch your money, but we at the caterer made was a poor example. 

Braising beef is very easy; it really only taxes your time. I'm talking about over the stove in the following case. Other methods for braising meat is in the oven or in a counter-top crock-pot. If you use fat or oil instead of a water-based liquid then it's called confit.

And, just to set people at ease, when I started working in the fancy kitchens in Manhattan and came across the word confit for the first time written on paper, I totally did pronounce it "KAHN-fit". The word is French, and pronounced "kohn-FEE".

In any case, the meat here is cheap beef. Cube it and season it. Start with some mire poix in the pot:


For this particular job dredge the cubed beef in a mixture of flour, salt, pepper and cayenne:


The flour dredge isn't necessary really, but for this simple recipe it helps with thickening the sauce. Not necessary.

The liquid for this braise/stewing is a simple one: 4 cups water and a half cup soy sauce. Beef tips in general can have different kinds of braising liquids, but it doesn't need to get too fancy; no ketchup or mustard or beer or pickle juice or savory spices needed.


Once the mire poix is done, the bottom of the pan will look nice and covered with yummy glace:


That's flavor right there. Remove the vegetables and set them aside. Add some more oil and start browning your beef chunks.


Pay close attention, as the flour will have a tendency to burn and pretty much screw everything up. Get the heat turned down and constantly prod the beef. This is contrary to how you brown meat for stewing in normal cases when no flour is being used.

Once all the cubes are browned, return all batches (most likely) and vegetables back into the pot along with the water and soy sauce:


Simmer until the beef is fork tender, anywhere between 30 to 60 minutes (checking periodically):


Serve over rice with some greens. I prefer blanched broccoli:


Tuesday, January 8, 2013

Pounded Top Sirloin Steaks

Happy New Year and welcome back to my home-cooking blog, a blog I have inadvertently ignored over the past six weeks. The holidays came and went, I cook almost everyday, and I even take lots of pictures...well, some pictures. Anyway, I have a bunch of pictures that I today find myself having a hard time placing.

But today I thought I'd ease myself back into the foodie swing with something easy, something quick.

Top sirloin is a cheap cut of beef, as far as the local Vons is concerned. Well, it's not blade steak, or a round roast, but it's certainly more affordable than eye-round or strip loin or T-bone or even the California specialty tri-tip.

Usually sirloin steaks come in thick pieces like the following:


From there, there's a number of things you could do: go for a large dice to make a stew; cut it down to strips for stir-fry; maybe even roast it whole. Today, none of those are what I'm going for. This is more of a how-to for one of my favorite diner breakfasts: Chicken Fried Steak.

From this spot, using the knife, cut the thick piece in half longways, giving you two of the same trapazoidal shape, but each half as thick:


Now things get simpler than you may think. Here you can use plastic bags, like I have in the following pictures, or you can use plastic wrap layered a few times. The basic idea is that you want the meat covered because you're going to be pounding it down, an action that takes patience, time, and elbow grease. Start with:


And eventually you'll be left with this great big sheet of beef:


The idea is to pound it down to between a half-inch and a quarter-inch thick. After getting the meat like this, bread it with the tri-wash of flour, egg, and seasoned bread crumbs and you're ready for deep-fry or pan-fry or even oven bake.

Quick note: When the pounded meat is as thin as a quarter-inch, what you have is the German dish schnitzel. They deep fry their schnitzel, which is what makes it so great. The half-inch pound is what you tend to see in diners for chicken fried steak.

Friday, November 9, 2012

Market Tomato Sauce from Scratch--Vegetarian Even

I went to one of the local markets and found a seller selling bags of super ripe tomatoes for a buck; five for a buck.

I picked one up, also got an onion and some garlic, and some thyme and basil, and still spent barely under five bucks.

To start this kind of pomodoro sauce, you first need to get the skins off the tomatoes before you'll be able to make a nice sauce. Blanching them is the fastest way to do that, and besides, you'll want to stew the tomatoes a little.

To blanch them, core the tops:


And score the bottoms, slice an "X" in them. This will make it quick peeling business once you drop them in ice water from the boiling water.


Here's a picture of the "before" prep work. For this sauce I went old school-industrious style, and used a box grater for the onion and a hard-cheese grater for the garlic:


Here's the "after", the onion and garlic grated and retaining their spilled juices:


Here're the tomatoes in the boiling water. The skins will start to slough off, and that's when you drop them into ice water, and then moments later peel off the skins. From there I'd drop them back into the boiling water, to stew them a little more, but not for too much time, maybe two minutes or less.


Once stewed, I used a potato masher to mash the tomatoes. They don't need to be fully cooked through, since you'll be getting to them later


Starting with olive oil, add the onions.


Once nice and soft, add the garlic, red pepper flakes, and thyme. Work it until it blooms, and your kitchen fills with the nice aroma:


Then add your wine. I only had red wine, so it comes out an odd purple. Reduce it by half.


Next add water or stock, bring to boil, and add the tomato. I used stock, and I didn't use enough to be able to break down the tomatoes for long enough to meld the flavors completely. Be sure to have been adding salt and pepper, and add a tablespoon of sugar with the tomato to counteract the acidity. It won't make anything sweet.


Balsamic vinegar is another thing that can be added, even though acidity can be an issue. It brightens the flavor and brings out the savory with its own sweetness. It's hard to explain.

Right near the end add a healthy amount of fresh chopped basil. You'll be able to tell it's almost done when the tomato will be mostly broken down, but still partly chunky.


This is also vegan, but not because I wanted it that way; it just worked out like that. If you want, mounting it with butter is a good way to alter the mouth-feel, but isn't necessary. (To mount it, put a little butter in and mix it vigorously off the heat.)

It gets better by the day, also. I used it with angel hair pasta and sliced sausage.

Wednesday, October 31, 2012

Small Post: Sweet and Spicy Grilled Corn

This is the Halloween post for grub, and since candy corn isn't something you can make easily enough (maybe it is, I don't know) I thought I'd talk a little about regular corn.

Grilled corn, anyway.


So it starts with corn on the cob, and once you peel back the stocks, you give yourself a nice handle (the stalk). I have some Mai Ploy chili paste, which is a red paste made from all sorts of great aromatics. I use it in Thai soups, curries, and even for grilling occasionally.

Like here for corn. I mixed about a tea spoon of the paste with a table spoon of brown sugar and then mixed  that into a half cup of coconut milk. I blended it well, and used it as a baste for the corn.

The cobs will develop a nice glaze, and when you go to eat them, you'll be surprised at how they look shiny and wet, but are actually quite dry to eat, but not in a bad way. Depending on how much chili paste you use will determine how spicy the corn will end up.

It's an exotic and easy recipe. Good stuff.